
1 DIY Veil
As you plan your wedding, you’ll fast discover that most wedding-related things are quite expensive, and you can easily overspend almost without realizing it. One of the surprise costs as you shop for your wedding day attire is the veil, which can easily cost a couple hundred dollars for the simplest of designs
 . Before you casually add a veil on to your wedding gown purchase, consider making it yourself. With as little as $10 in supplies and an hour or two, you can create your own veil that suits you to a tee.
Gather the supplies
The main thing you’ll need, of course, is some tulle (a.k.a. netting). This is available in any fabric store and can be found in 72″ and 108″ widths. For a fuller veil, use the 108″ wide tulle. The length of fabric you’ll need will vary depending on your desired veil length. Measure from the top of your head to where you want the veil to end and double that length. For example, a typical fingertip-length veil will be between three and four feet long, so you’ll need 6 to 8 feet (2 to 2 1/2 yards) of tulle.
Cut the tulle
Lay the tulle out on a large table (or a clean floor) and keep it folded in half lengthwise (this is how it was at the store). Put the folded edge nearest to you. At this point you have two layers of tulle.
Now fold the tulle in half crosswise by grabbing the rightmost edge and folding it over so that it touches the leftmost edge. At this point you have four layers of tulle.
Measure again how long you want the tulle to be (from the top of your head down) and cut the tulle to that length (keep it folded) if needed.
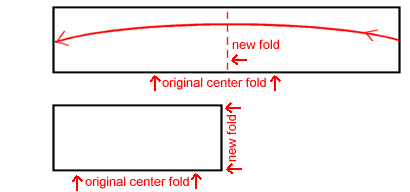
Now round off the top left edge of the fabric by pinning to mark it and then cutting in a smooth motion. If you need a guide, try a large serving platter. You want to be left with a quarter-circle shape:

Arrange the layers
Unfold the tulle completely. At this point you have one layer of tulle. The dashed red lines below show where the folds used to be:

Fold the tulle crosswise from right to left, but you don’t have to bring it all the way over. You can match the ends up for a single-length veil, or you can leave a few inches between the edges for a nice layered look. If you keep a shorter layer, it can be used as a blusher if you like. At this point you should verify that the length is exactly what you want and if it’s too long, cut one of the rounded ends shorter, as needed.

Gather the tulle
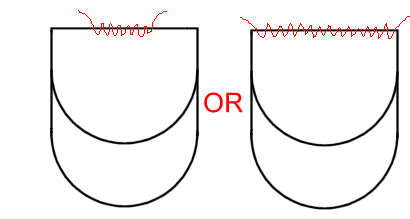
You will now have to decide if you want the edges of your veil’s two layers to come all the way up to the top of the veil or not. If you choose to have the edges come up to the top, the top of your veil will be puffier. This decision is particularly noticeable if you plan to put a ribbon trim on the edges, because the ribbon will clearly be only at the bottom or will go up to your head, depending on your choice. This picture illustrates the two variations:
For the first look above, you will gather up only the center portion of your tulle, as seen in the first diagram below. For the second look above, you will gather the entire width of the tulle, as seen in the second diagram below:
Once you have decided how much tulle to gather, do so with a needle and strong thread, weaving in and out with small stitches. Pull the thread to gather the stitched tulle so that it is only about 2 inches wide. Knot the thread securely.
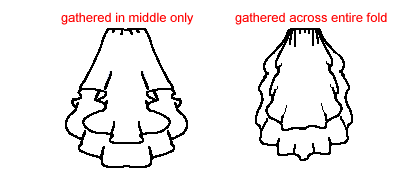
These photos show the gathering process on a short “center only” veil that I made for my niece to play dress-up with.

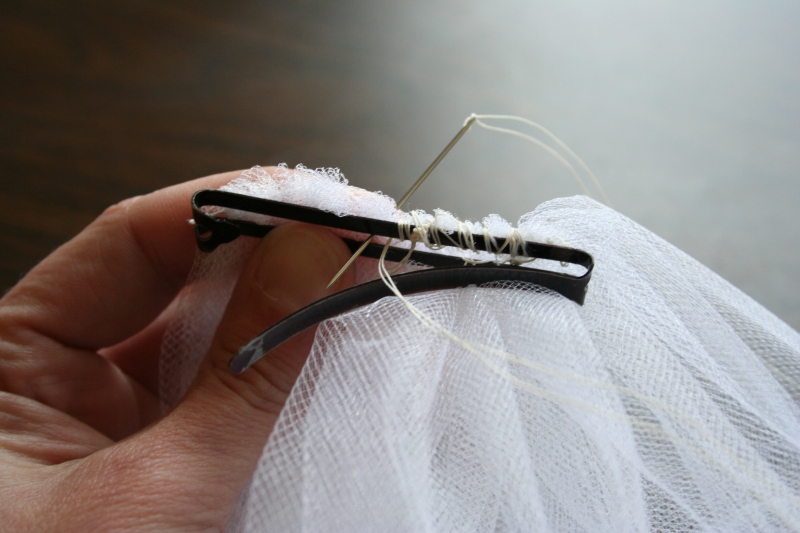
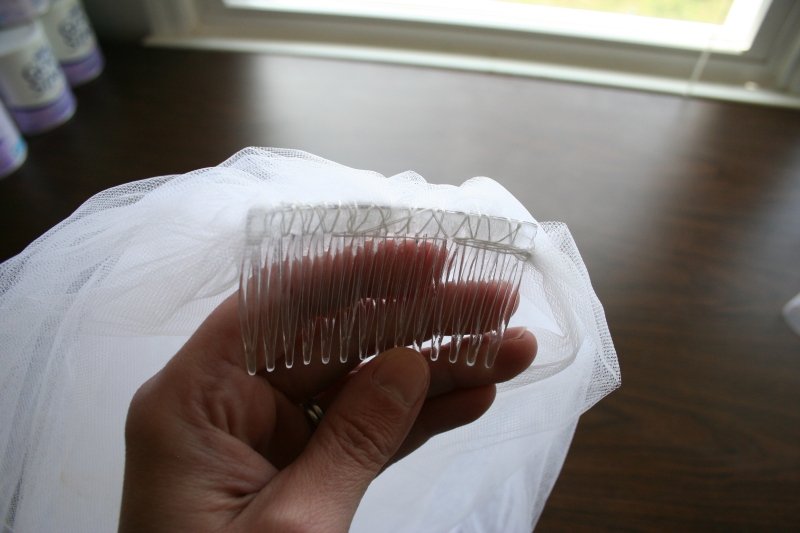
Attach the comb or barrette
Now take your gathered portion of tulle and sew it securely to either a simple French comb or a barrette.
You can still wear a fancy tiara or decorative barrette if you like; just place it right in front of your veil on your head. If you wish, you may also be able to sew the veil directly to the tiara, depending on its style.
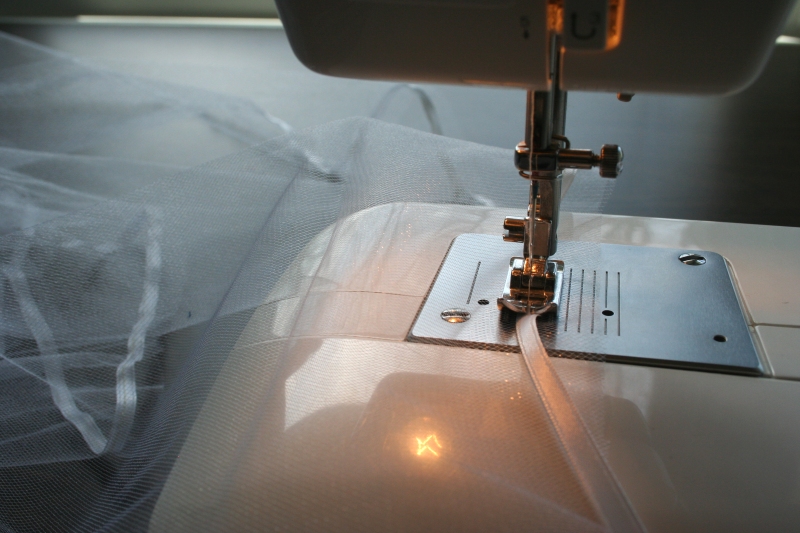
Decorate the veil (optional)
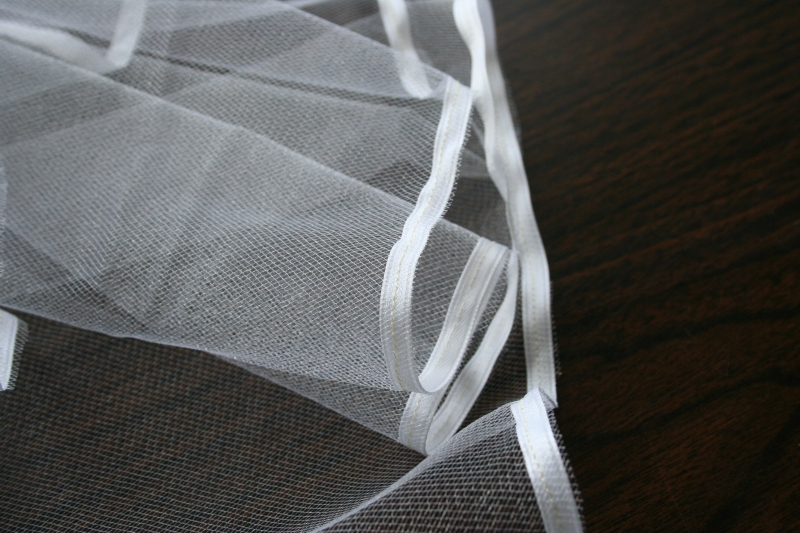
Your veil is ready to wear at this point, but you may want to decorate it further. A popular finishing touch is to sew a thin satin ribbon along the edges of the veil. You can do so easily with a sewing machine and some white thread. When sewing, don’t bother to try to get the ribbon right up against the end of the tulle — it’s far easier to just leave some extra and then come back and trim it later.
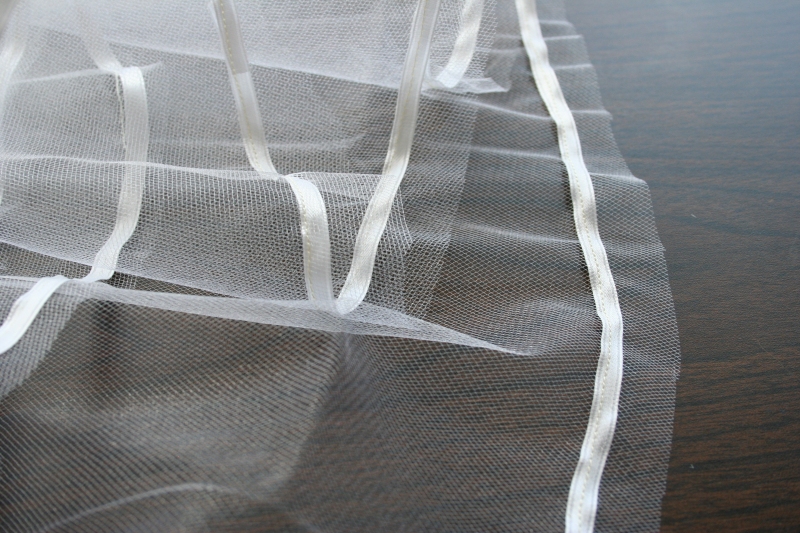
Now go back with scissors and trim the excess tulle right next to the ribbon. And don’t worry about trimming it perfectly. I promise that nobody more than 2 feet away from you will even be able to see it!
You may also choose to sew or glue tiny sparkling beads or gemstones randomly on your veil. If that’s what you like, then do it. It’s your veil, so it should be special and exactly the way you want it!
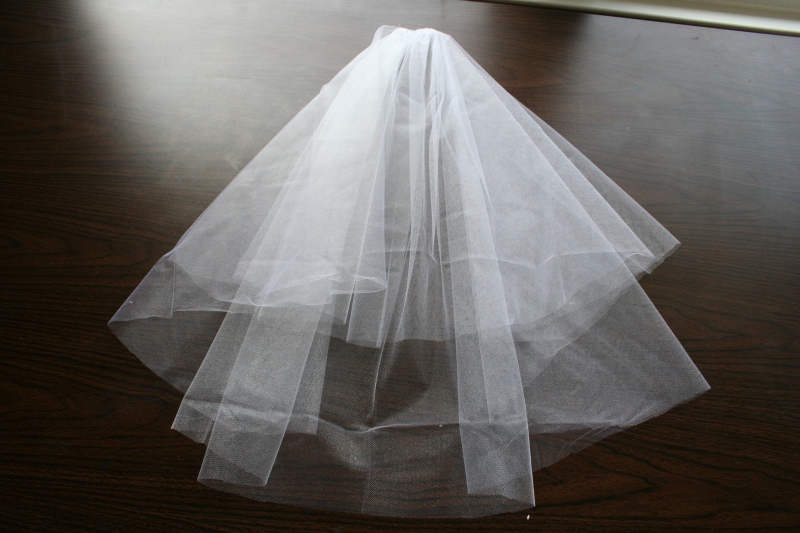
Congratulations! You’re done!
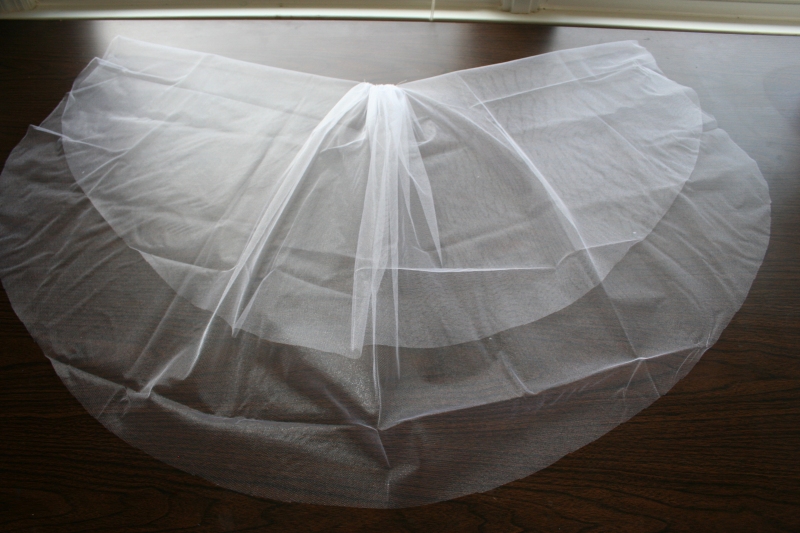
Here are two finished examples. My niece’s “play” veil is on the left and my actual wedding veil is on the right. This veil pattern can easily be adapted to any length and many different styles, from the simplest of play veils for little girls who want to play dress-up to beautiful full-length veils for the bride. Oh, and don’t forget those girls who are preparing for their First Communion. They will need their own veil for the ceremony! CREDIT{http://www.chicaandjo.com/2008/04/08/make-your-own-wedding-veil/}

2 Rope-Wrapped Vases
We’re so excited to share this nautical DIY rope vase with you today! These vases look awesome clustered together and make beautiful centerpieces for a wedding reception! If finding enough coffee cans to make vases for each table is too overwhelming, you could also make these to hold flowers on your gift, guest book or dessert table!
Materials
- Coffee Cans with labels removed or spray painted to be a solid color
- Rope (uncut)
- Hot Glue
- A glass jar to hold water for floral arrangements
Directions
- 1 & 2. Hot glue the end of your rope to the bottom of the can and begin wrapping the rope tightly around the can. I added a bit of hot glue every 4 inches or so and pressed the rope down.
- 3. Continue wrapping until you reach the top of the can.
- 4 & 5.Trim the rope and hot glue the edge of the rope to the can so it doesn’t stick out.
- 6. Place a jar in the can to keep it from rusting or leaking water. My cans didn’t feel sturdy enough to hold water. The vase also helps contain the flowers and allows you to use less flowers.


CREDIT{http://baysidebride.com/2012/04/diy-nautical-rope-vase/}
{http://www.buzzfeed.com/peggy/things-to-diy-instead-of-buy-for-your-wedding}
3 Mason Jar and Twine Flower Holders

Hang them over the chairs by the aisle. Small daisies, babies breath, and lavender look best and don’t require any professional flower arranging knowledge CREDIT{http://www.chicaandjo.com/2008/04/08/make-your-own-wedding-veil/}
4 Felt Ringbearer’s Pillow
Okay, I lied when I said that wedding posts were done for the week. For those of you who cringe at the sight of these, don't worry, your regularly scheduled programming will return soon....
So. The ring pillow. Why are good ones so hard to find? Almost all of them are frilly and expensive. This is my DIY version. I bought the felt from Felt On The Fly (pure wool felt cuts cleanly and is thicker than regular felt), cut out two 6" squares and sewed some felt leaves on, then added a few tiny translucent seed beads for "sparkle" (these are the same beads I use on the me and you necklaces). The pillow is stuffed with fiberfill, which looks like a hovering cloud in the photo below. Weird, right? It reminds me of one of my favorite movies.
Hope you're having a nice weekend. CREDIT{http://www.elephantineblog.com/2011/06/our-diy-ring-pillow.html}
5 Candles in Terracotta Pots

With a little fake moss, these table candles take minutes to put together. For a tutorial to create these advent candles, visit CREDIT {http://www.eabdesigns.typepad.com} {http://2lovely.tumblr.com/post/30196038390/for-a-tutorial-to-create-these-advent-candles}
6 DIY Rope Words
 Today we have another fun + super easy DIY for your wedding day from our DIY contributors, Jessica + Garett over at Wednesday. Take it away guys!Who would have thought using jute beyond the 1970’s could be so cute! These rope words are a perfect way to label your seats at your wedding reception or holiday table. They are also great for expressing thanks and love in wedding photos. This project is as easy as it is messy! Really, from start to finish this project took about 10 minutes.
 Once you have all your supplies, prepare your working area by laying down the wax paper.Next pick a word you want to scribe out in rope. Keep in mind that the longer the word the more flimsy it will be dried. Depending on how confident you feel with your freehand rope writing, you may want to sketch out your word out on the wax paper to trace your rope over.
 Next mix the cornstarch, glue and warm water together in a mixing bowl until it’s not clumpy.
 Begin feeding the rope into the glue mixture and allow the rope to be fully saturated by the glue.
 Now it’s time to write out your word with the rope. Push down hard in the areas where the rope overlaps. You may also need to apply extra glue mixture to those areas to ensure the hold when dried. And that’s it! Once you’ve finished let your word dry on a hard, flat surface for 12 hours.
 A Just Hitched would be a cute prop for photos and the Mr and Mrs words are perfect for the back of your chairs. And there are lots more ways to use this fun DIY! I’d love to hear any other ideas you came up with for this one in the comments. Happy crafting CREDIT{http://greenweddingshoes.com/diy-rope-words-for-your-wedding-day/}
7 Paper Lantern Column
Light Columns
Geometric "topiaries" inspired by the paper sculptures of Isamu Noguchi stand on both sides of this swimming pool. A few white plastic beach balls tied to weighted lines float in the pool like pearls cut loose from a giant strand (for safety, never cover the surface of a pool with a large number of balls).
STEPS


No comments:
Post a Comment